Making your own candy at home can be a fun and rewarding experience. Whether you are looking to satisfy your sweet tooth or create unique gifts for friends and family, homemade candy allows you to get creative in the kitchen. Why not try your hand at crafting delightful treats from simple ingredients you may already have?
From chocolate-covered pretzels to coconut almond bars, homemade candy recipes cater to different tastes and skill levels. You don’t have to be a professional chef to enjoy the process; many recipes are straightforward and perfect for involving kids in the fun. Dive into these recipes and discover new favorites that you can make again and again.

1) Peppermint Patties
Peppermint patties are a classic and refreshing treat. You can make these at home with just a few simple ingredients.
Start by mixing sweetened condensed milk and peppermint extract in a large bowl. Gradually add powdered sugar until the mixture forms a dough.
Roll the dough into small balls, about 1 inch in diameter. Place them on a parchment-lined baking sheet. Flatten each ball to create a patty shape.
Let the patties dry or harden in the fridge for about 20–30 minutes.
Melt chocolate chips and a bit of shortening in the microwave or on the stove until smooth. Dip each peppermint patty into the melted chocolate, coating it well.
Allow the excess chocolate to drip off. Lay the dipped patties back on the parchment paper to set.
Peppermint patties made at home taste fresh and are perfect for any occasion.
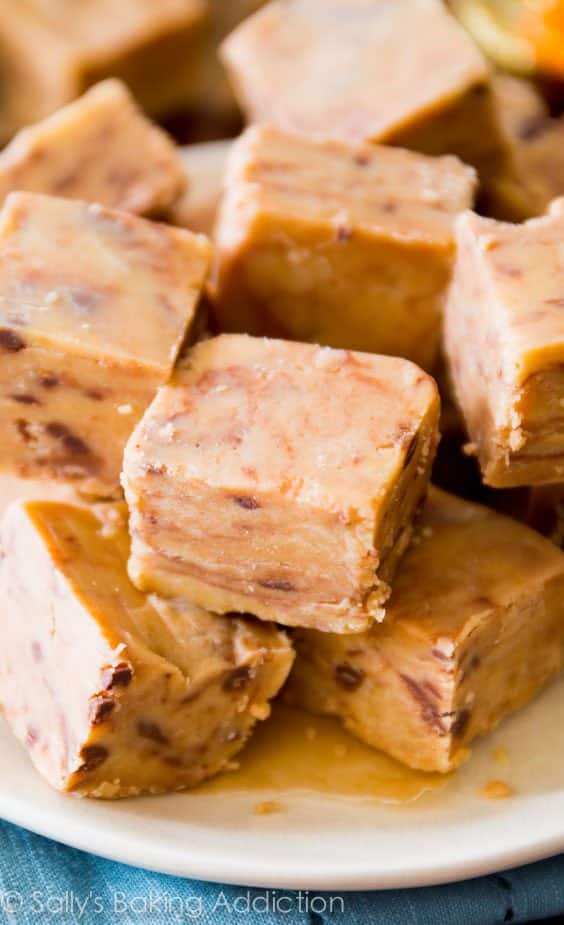
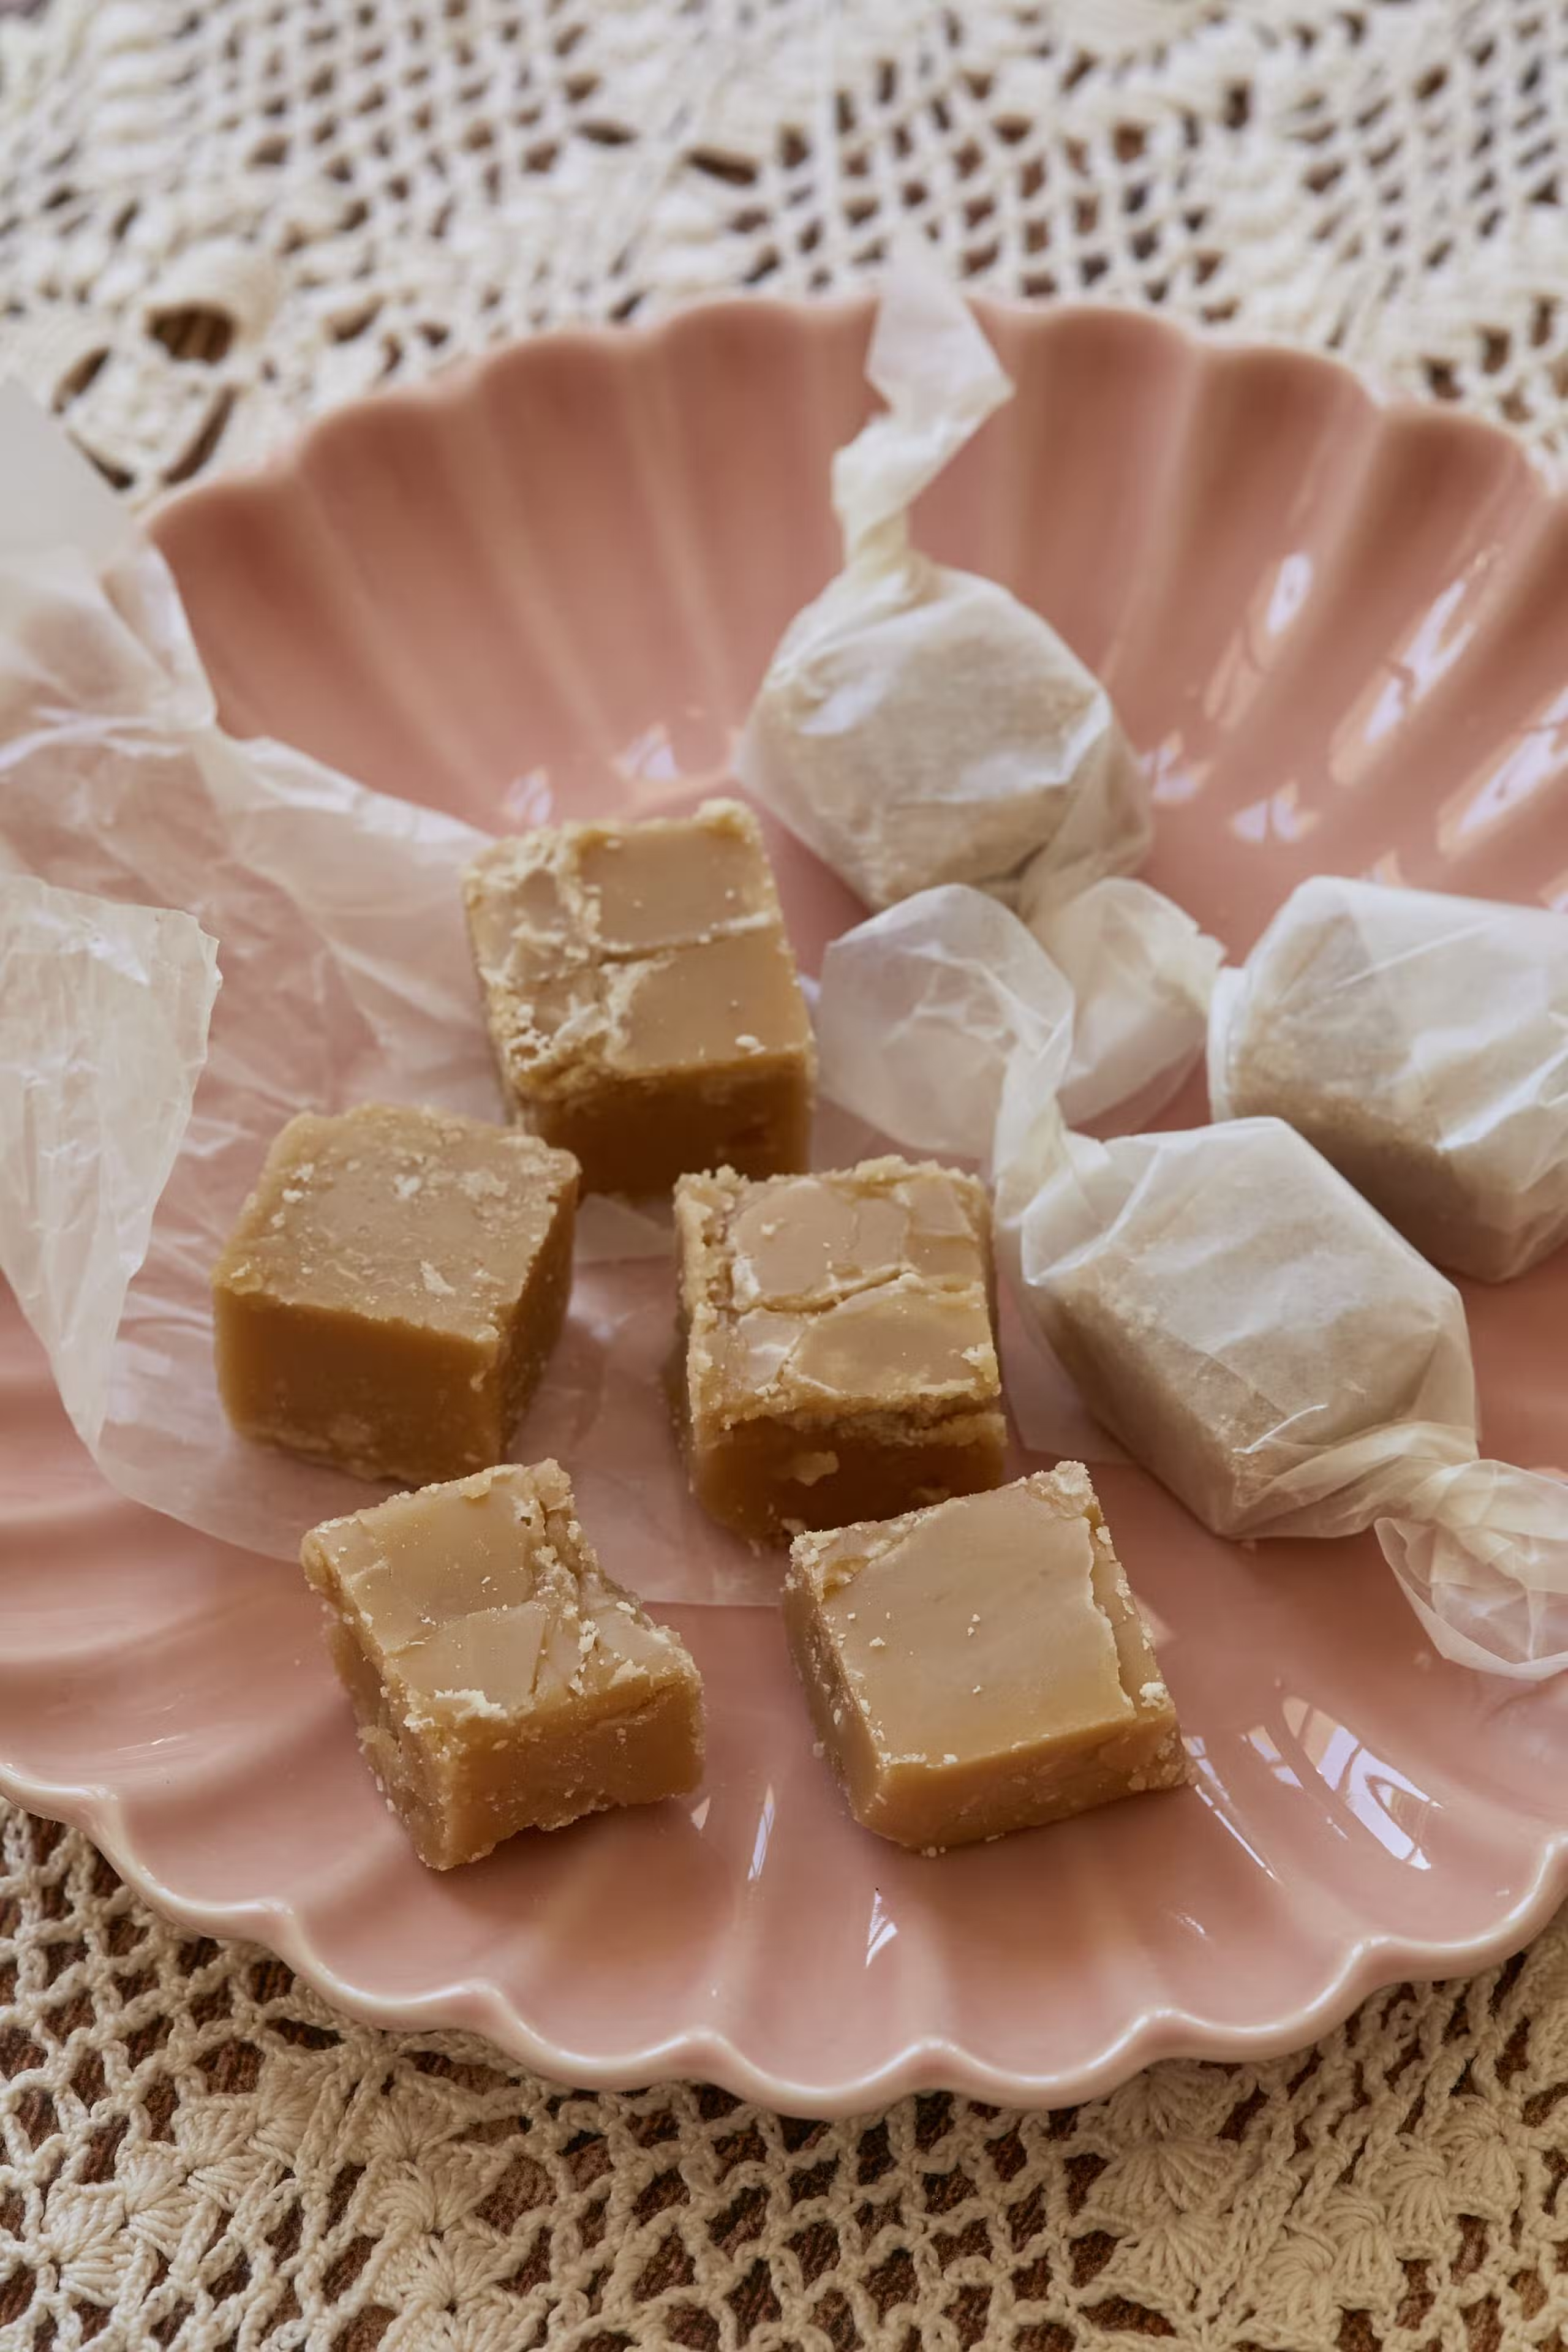
2) Peanut Butter Fudge
Peanut butter fudge is a delightful treat that you can easily make at home. It requires simple ingredients and minimal effort.
Start by melting butter in a medium saucepan over medium heat. Add brown sugar and milk to the pan. Stir continuously until the mixture comes to a boil.
Boil the mixture for about 2 minutes while stirring frequently. Remove the saucepan from the heat. Mix in your peanut butter and vanilla until the mixture is smooth.
In a large mixing bowl, place confectioners’ sugar. Pour the hot peanut butter mixture over the sugar. Stir until everything is well combined and smooth.
Prepare a baking dish by lining it with parchment paper or greasing it lightly. Transfer the fudge mixture into the dish and spread it evenly. Allow the fudge to cool completely.
Once the fudge has cooled, use a sharp knife to cut it into squares. Store your peanut butter fudge in an airtight container to keep it fresh. This homemade candy is perfect for sharing with friends and family.

3) Caramel Turtles
Caramel Turtles are a delightful treat combining pecans, caramel, and chocolate.
To start, toast the pecans in a 350°F oven for 8-10 minutes. Let them cool.
Next, make the caramel. Combine brown sugar, condensed milk, butter, and salt in a saucepan. Heat until the mixture reaches 240°F.
Arrange small clusters of pecans on a baking sheet. Spoon the caramel over the pecans.
Melt chocolate and coat each pecan cluster. Chill until the chocolate hardens. Enjoy your homemade Caramel Turtles!

4) Coconut Truffles
Coconut truffles are a delicious and easy-to-make treat that brings a tropical twist to your homemade candy collection.
To begin, mix shredded coconut and condensed milk in a bowl. This creates a sticky and sweet base. You can adjust the coconut and milk ratio to find the perfect texture for rolling.
Chill the mixture for about 30 minutes. This helps it firm up, making it easier to shape. Once chilled, scoop out small portions and roll them into balls.
For a different texture, you can add coconut cream, butter, and powdered sugar. This produces a richer, creamier filling. Chill the mixture, roll into balls, and coat with shredded coconut or melted chocolate.
You can also try adding flavors like vanilla or coconut extract for a sweet and aromatic touch. This makes each bite more delightful.
For a fun twist, toss in some berries or toasted coconut. These add color and a different flavor profile.
Keep the truffles in the fridge until you are ready to serve. They stay firm and fresh, perfect for any occasion.
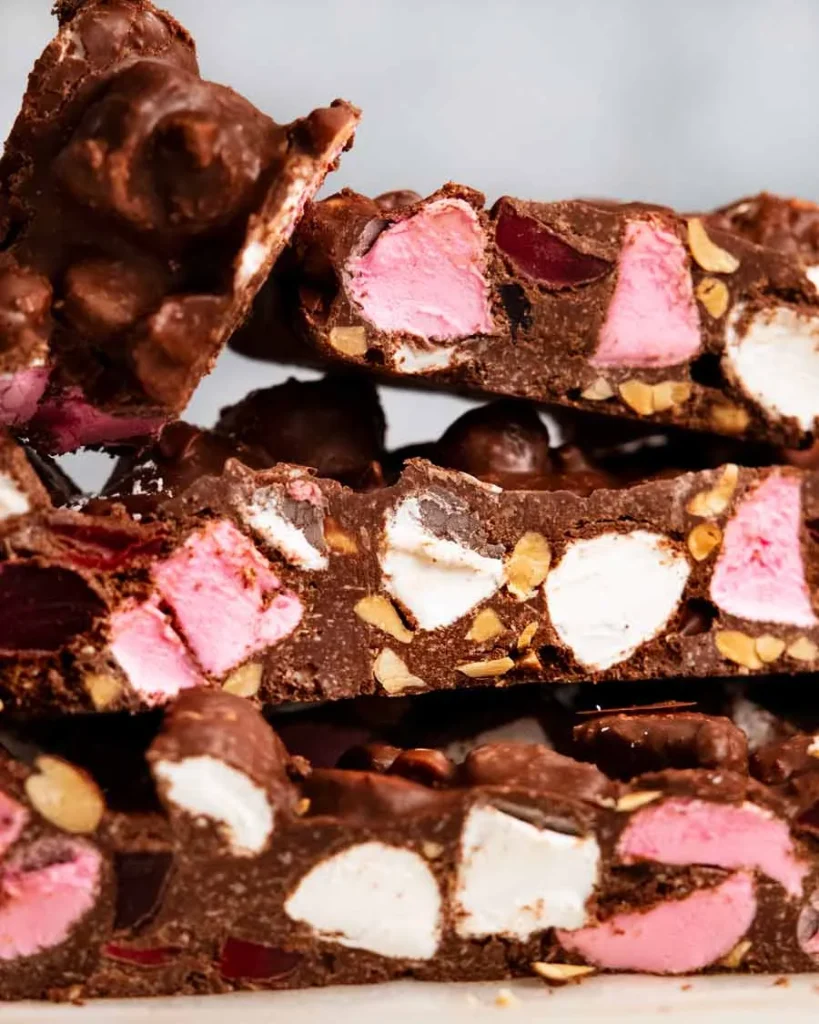
5) Rocky Road
Rocky Road is a delightful treat that combines chocolate, marshmallows, and nuts. It’s a versatile recipe that you can easily make at home.
Start by melting chocolate chips in the microwave in 30-second bursts until smooth. Use a microwave-safe bowl and stir after each interval to ensure even melting.
Once the chocolate is melted, mix it with marshmallows and peanuts. You can also add other ingredients like dried fruit or other nuts if you prefer.
Line a baking pan with parchment paper. Pour the chocolate mixture into the pan, spreading it out evenly.
Let the mixture cool and harden in the refrigerator. Once firm, cut it into squares or bars. Enjoy your homemade Rocky Road!
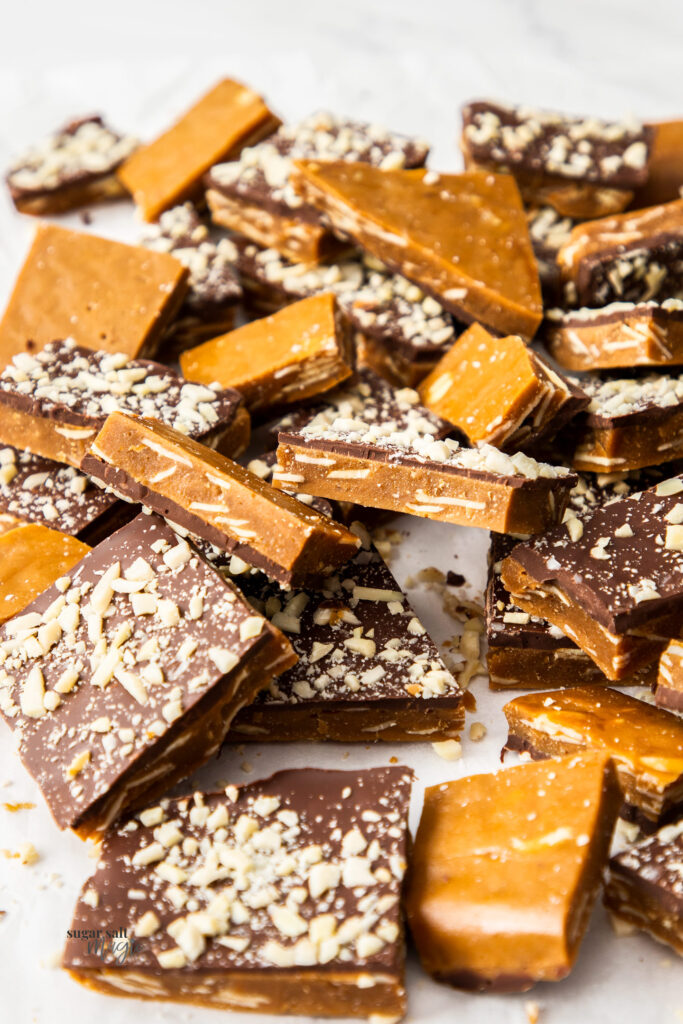
6) Buttercrunch Toffee
Buttercrunch toffee is a delicious treat that’s both crunchy and sweet. It’s perfect for holidays or just as a snack.
Start by melting butter in a heavy saucepan. You will need to add sugar, water, and corn syrup. Stir the mixture over medium-high heat until it reaches the hard-crack stage, which is about 300°F on a candy thermometer.
Pour the mixture into a lined baking pan to cool. While the toffee is still hot, sprinkle mini chocolate chips on top. Cover the pan with foil so the chocolate melts.
If you like nuts, you can toast some almonds and add them to the toffee before it cools completely. Use a 9 x 13 inch pan for thicker pieces or a 10 x 15 inch pan for thinner ones.
Once the toffee has completely cooled and the chocolate has set, break it into pieces. Store your buttercrunch toffee in an airtight container to keep it fresh.

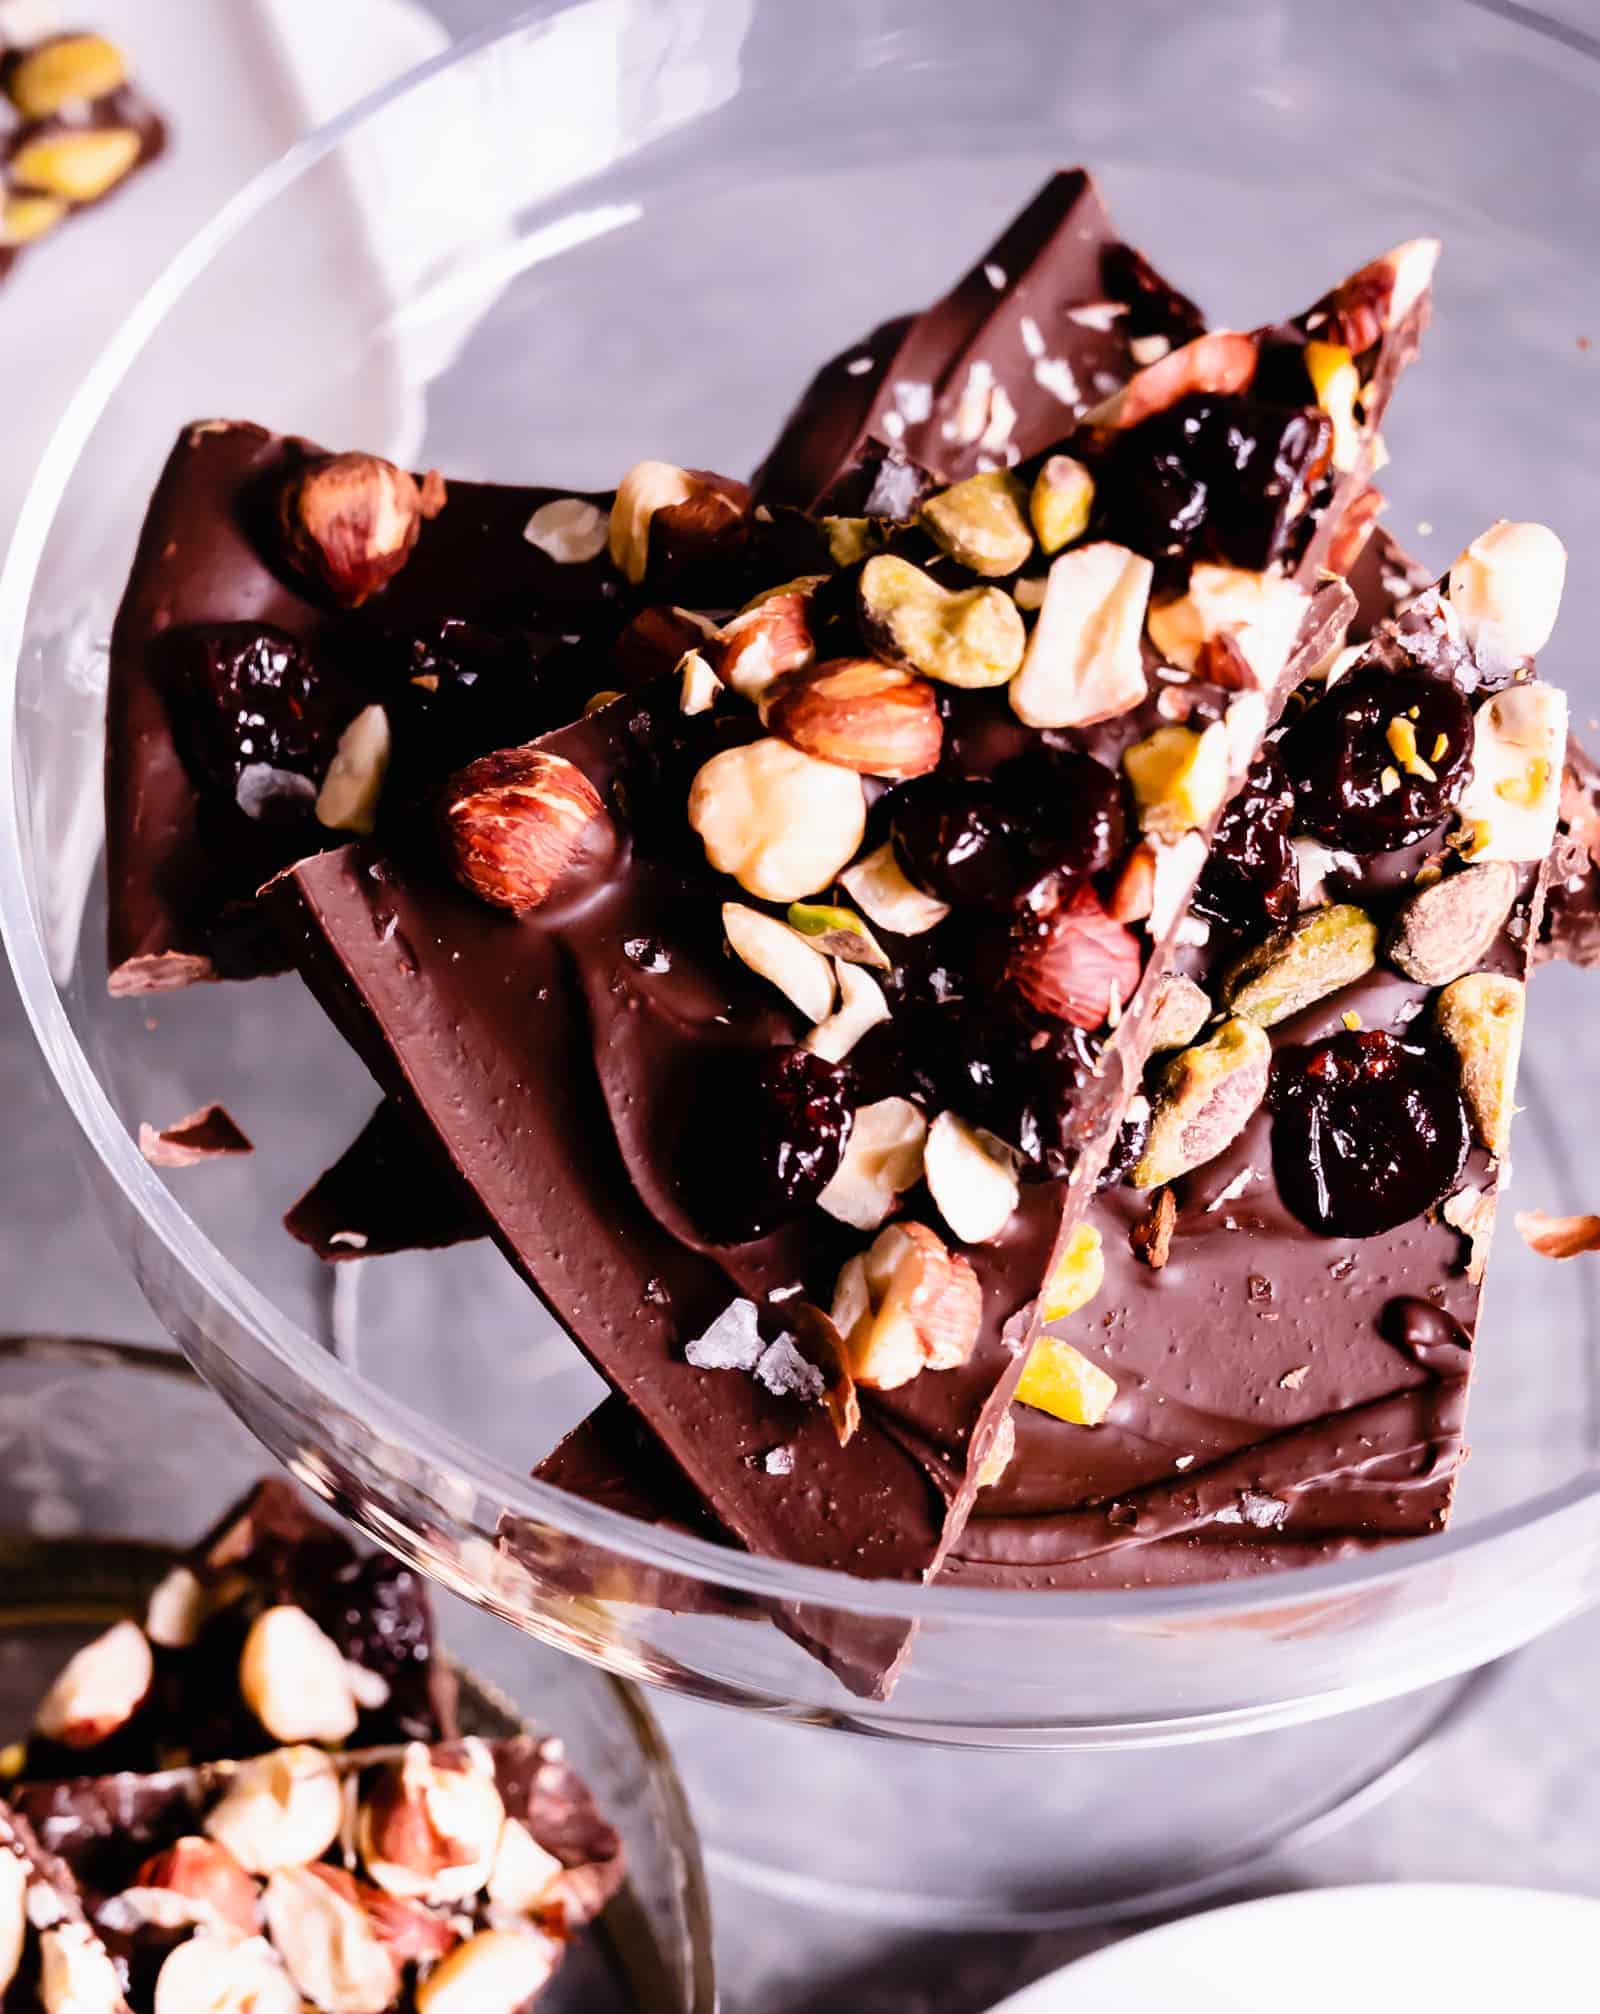
7) White Chocolate Bark
White chocolate bark is a simple yet impressive treat. To make it, start by melting white chocolate in a microwave-safe bowl. Use 20-30 second intervals and stir well each time. Once fully melted, spread the chocolate thinly on a parchment-lined baking sheet.
Next, add your favorite toppings. You can use nuts, dried fruits, or even crushed candies. Slightly press them into the melted chocolate. This ensures they stick well as the chocolate hardens.
Allow the bark to cool completely. You can speed up this process by placing the sheet in the refrigerator. Once set, break the bark into pieces using your hands or a knife.
White chocolate bark is perfect for gifting or as a quick homemade snack. Experiment with different toppings to create your favorite combinations. The possibilities are endless and only limited by your creativity.
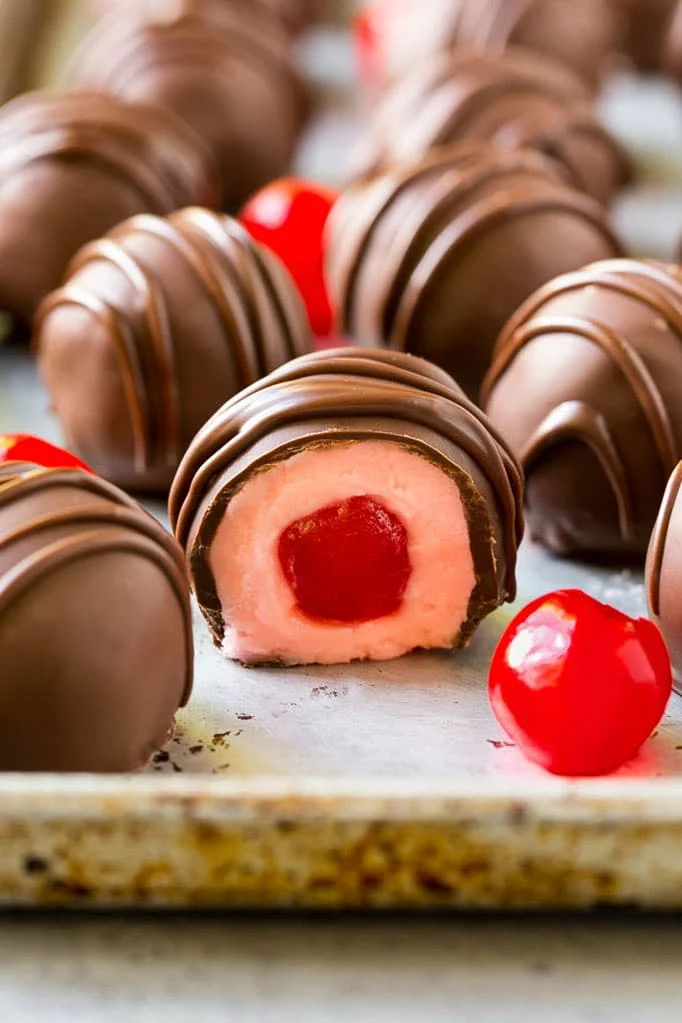
8) Chocolate-Covered Cherries
Chocolate-covered cherries are a delightful treat that combines the sweetness of cherries with the richness of chocolate.
First, drain and dry your cherries on a paper towel. This ensures they won’t make your dough too wet.
In a medium bowl, mix butter and corn syrup until smooth. Gradually add powdered sugar and knead it into a dough. If the dough is too soft, chill it for a bit.
Take a small amount of dough, about one teaspoon, and wrap it around each cherry. Place these wrapped cherries on a cookie sheet and chill until firm.
Prepare your chocolate by melting chocolate chips and a bit of oil in a double boiler or a microwave. Stir until smooth.
Dip each wrapped cherry into the melted chocolate, ensuring it’s fully coated. Place the cherries on a parchment-lined baking sheet to set.
Chill in the fridge until the chocolate hardens. Your chocolate-covered cherries are now ready to enjoy!
9) Maple Candy
Maple candy is a tasty treat that highlights the natural sweetness of maple syrup. You only need a few basic ingredients and tools to make it at home.
Choose high-quality pure maple syrup for the best flavor. Pour 2 cups of maple syrup into a large, heavy-bottomed saucepan.
Attach a candy thermometer to the side of the pan. Heat the syrup on medium-high until it reaches 235 degrees Fahrenheit (110 degrees Celsius).
Once the syrup reaches the desired temperature, remove it from heat and let it cool to 175 degrees Fahrenheit (80 degrees Celsius). Do not stir during this cooling process.
After cooling, stir the mixture rapidly with a wooden spoon until it begins to thicken and lose its gloss. This step is crucial for achieving the right texture.
Prepare your candy molds by buttering them thoroughly or spraying with non-stick spray. Pour the thickened syrup into the molds.
Allow the candy to cool and harden completely before removing from the molds. Enjoy your homemade maple candy as a sweet snack or gift!
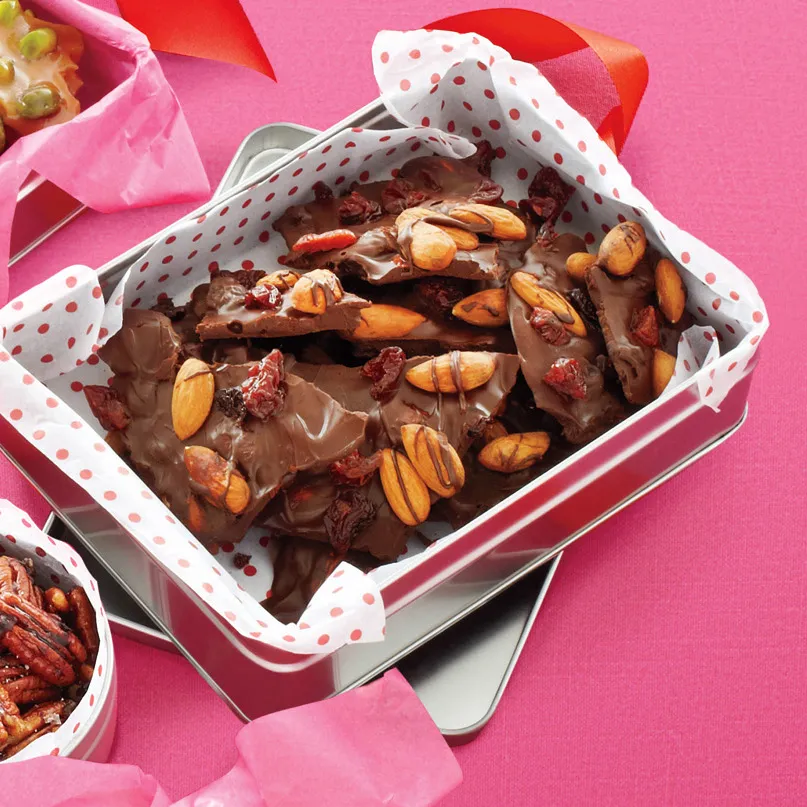
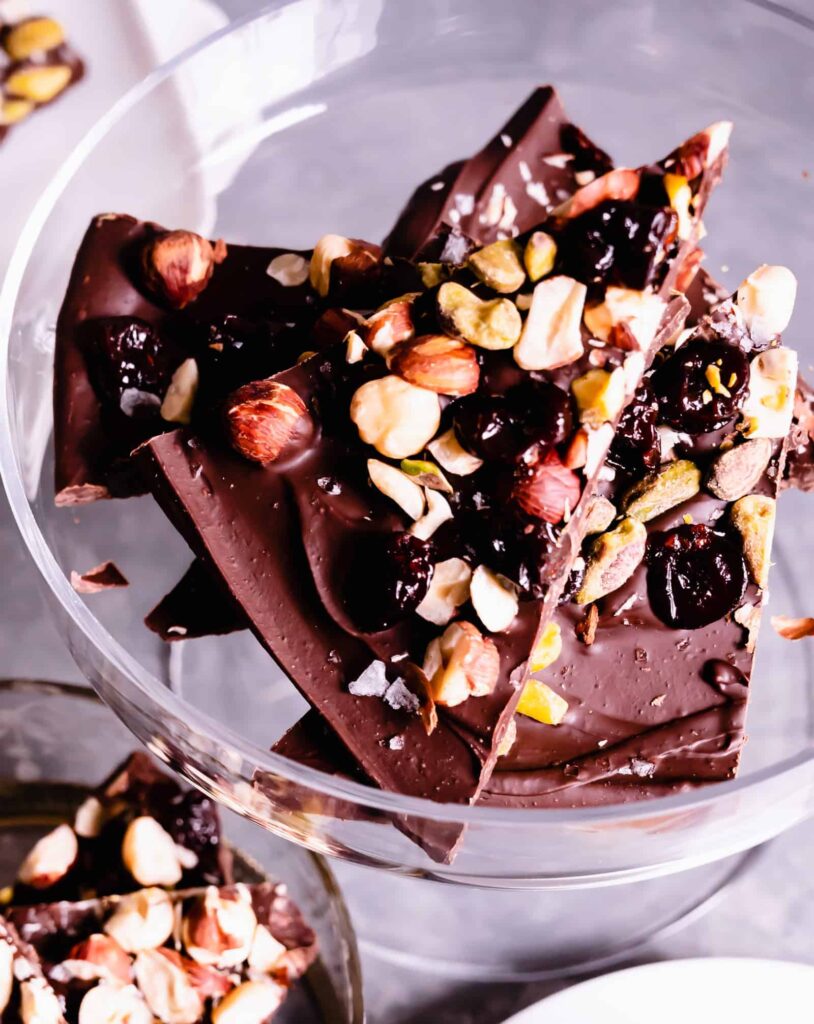
10) Cherry Almond Bark
Cherry Almond Bark is a delicious treat that combines the sweetness of cherries with the crunch of almonds. It’s easy to make and looks beautiful on any dessert table.
Start by toasting your almonds. Spread them out on a baking sheet and bake at 350°F for 8 to 10 minutes. Let them cool.
Next, melt your chocolate. Use a double boiler method to keep it from burning. Once melted, add the remaining chocolate and stir until smooth.
Mix in the toasted almonds and dried cherries until everything is evenly coated. Spread the mixture on a parchment-lined baking sheet.
Chill the bark in the refrigerator until it is firm. Once set, break it into bite-sized pieces and enjoy.
This easy recipe is perfect for gifting or satisfying your own sweet cravings.
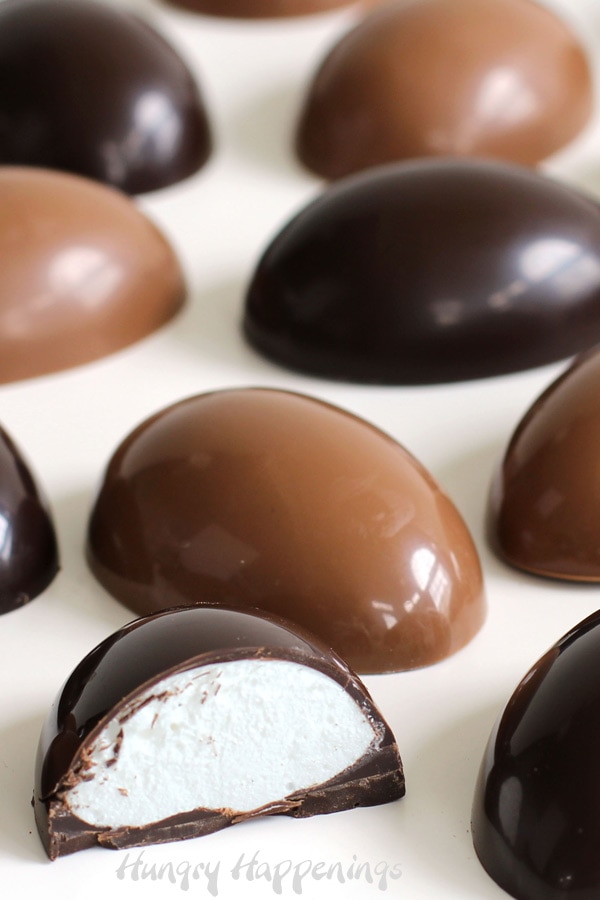
11) Marshmallow Bonbons
Marshmallow bonbons are a delightful treat that is perfect for any occasion. They’re quick to make and can be customized with various coatings.
To get started, you’ll need large marshmallows and a selection of toppings such as sprinkles, chopped nuts, or shredded coconut. Melt some chocolate chips in the microwave or a double boiler until smooth and glossy.
Using a skewer or fork, dip each marshmallow into the melted chocolate, ensuring it is fully coated. After dipping, roll the marshmallow in your chosen toppings. Place the coated marshmallows on wax paper to set.
You can also use fudge or caramel sauce instead of chocolate for a different flavor. Just dip the marshmallow in the sauce and cover with toppings as before. Allow them to chill in the refrigerator until firm.
This easy recipe lets you create delicious and fun treats that everyone will love. Enjoy making and sharing these sweet bites!
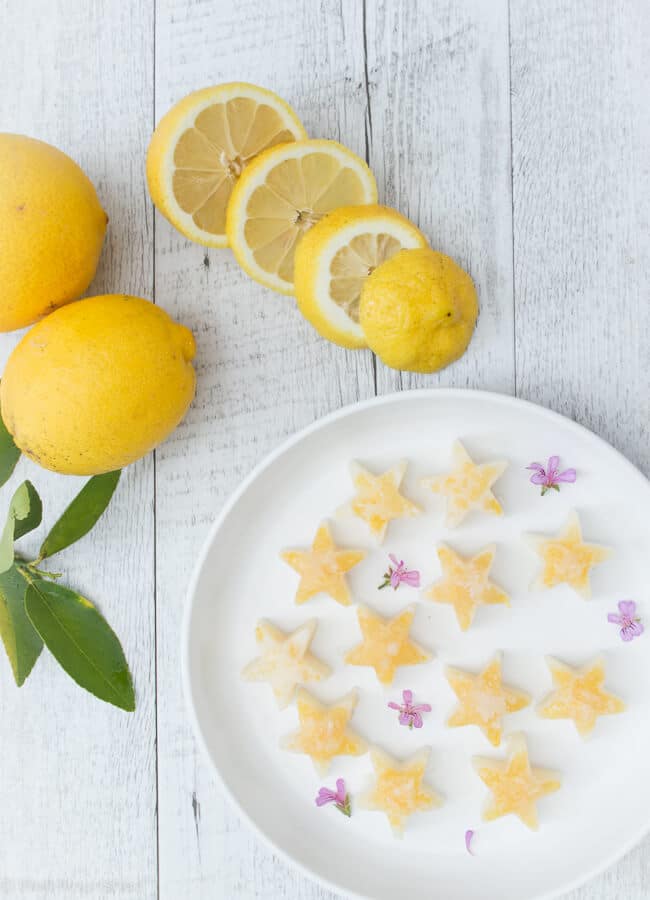
12) Lemon Drops
Lemon drops are a classic candy that combines sweet and tart flavors. To start, you need to gather your ingredients: granulated sugar, water, and either lemon juice or lemon zest. Some recipes also call for cream of tartar or corn syrup.
In a saucepan, mix sugar and water over medium heat. Stir until the sugar dissolves. If you’re using cream of tartar or corn syrup, add these ingredients as well.
Once the sugar has dissolved, stop stirring. Attach a candy thermometer to the pot or have a digital one handy. Heat the mixture until it reaches around 310 degrees Fahrenheit, which is the hard-crack stage.
At this point, add your lemon juice and zest. This gives the candy its signature tangy flavor. Be careful, as the mixture will be very hot.
Pour the mixture onto a greased baking sheet or into molds. Allow it to cool and harden completely. Once the lemon drops are set, you can break them into pieces or remove them from the molds.
Store your lemon drops in an airtight container to keep them fresh. Enjoy your homemade lemon drops whenever you crave a sweet and tangy treat!

13) Cinnamon Hard Candy
Cinnamon hard candy is a classic treat with a spicy kick. It’s perfect for holiday gifting or enjoying year-round.
First, gather your ingredients: sugar, corn syrup, water, cinnamon oil, and food coloring.
Lightly grease a baking sheet or line it with foil. Spray it with non-stick cooking spray.
In a saucepan, combine the sugar, corn syrup, and water. Heat over medium heat, stirring until the sugar dissolves.
Once dissolved, stop stirring. Insert a candy thermometer and cook until the temperature reaches 310°F. This usually takes about 15 to 20 minutes.
Remove the saucepan from the heat. Carefully add your cinnamon oil and food coloring, then stir.
Quickly pour the mixture onto your prepared baking sheet. Let it cool and harden completely.
Once hard, break the candy into pieces. Store in an airtight container.
Cinnamon hard candy is a simple and flavorful project. Enjoy making and sharing these spicy sweets!
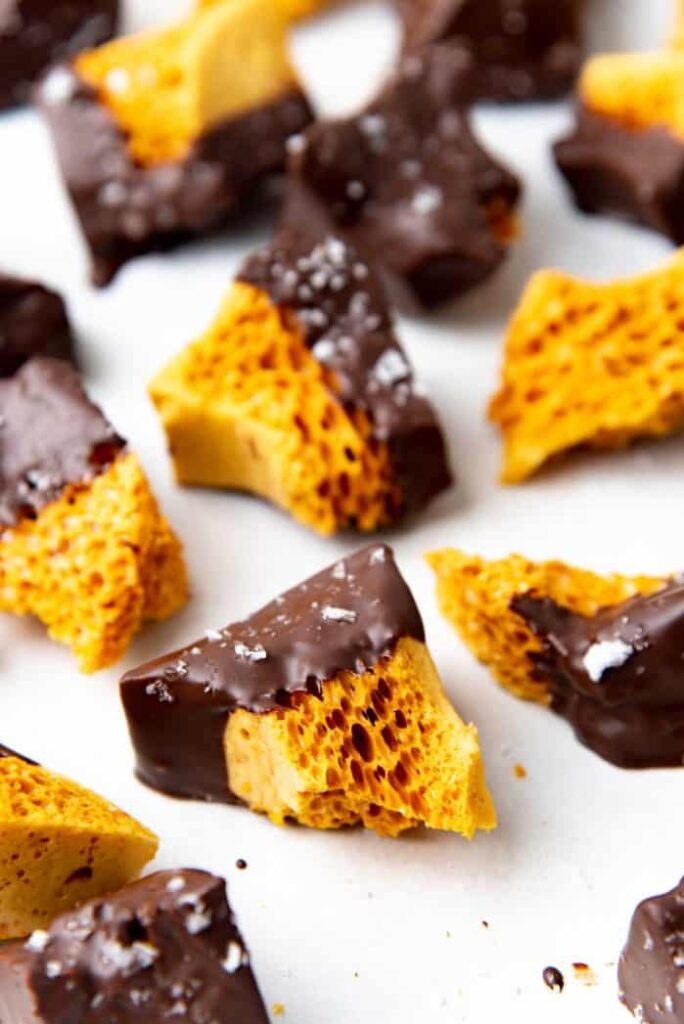
14) Honeycomb
Honeycomb candy is a crispy, airy treat that you can easily make at home. You’ll need sugar, honey, water, and baking soda. Some recipes also call for corn syrup.
Start by lining an 8×8 pan with parchment paper. This will help you remove the candy later. In a heavy-bottomed saucepan, add sugar, honey, and water. Shake the pan to lay the mixture flat but don’t stir.
Heat the mixture over medium-high heat. Use a candy thermometer to check when the temperature reaches 300°F. This is the hard crack stage.
Once it reaches 300°F, remove the pan from heat immediately. Quickly add baking soda and stir. The mixture will bubble up, creating the airy texture. Be cautious, as it’s very hot.
Pour the mixture into the prepared pan. Don’t spread it, just let it settle. Allow the candy to cool completely before breaking it into pieces. Enjoy your homemade honeycomb as a snack or crumble it over desserts like ice cream.
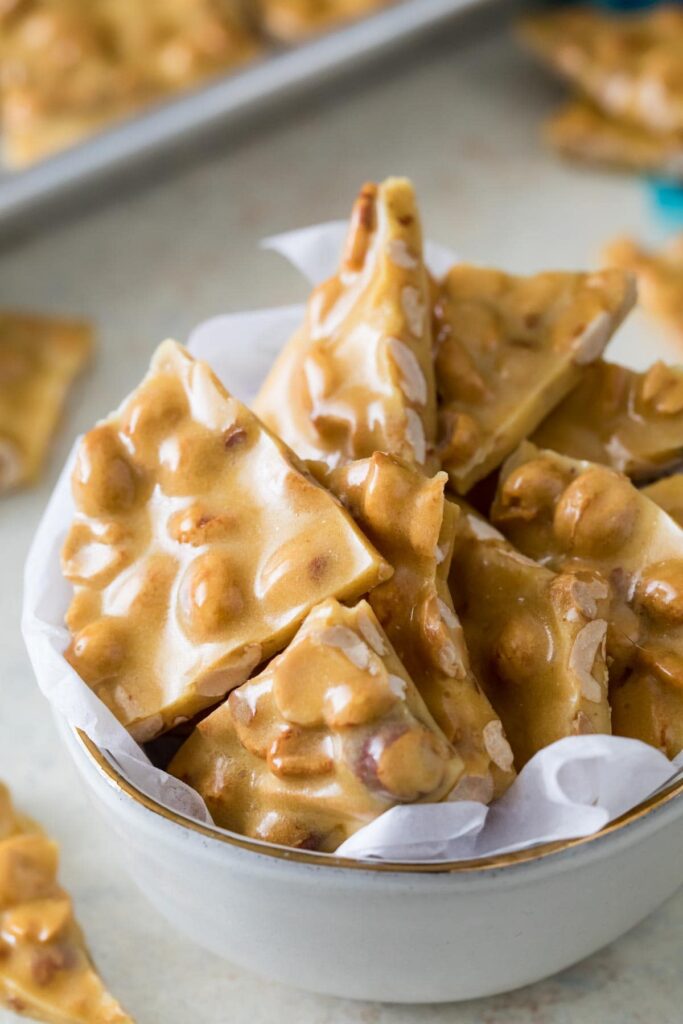
15) Peanut Brittle
Peanut brittle is a classic homemade candy that combines sweet and salty flavors. To make your own batch, start by greasing a large baking sheet with butter or lining it with parchment paper.
In a medium saucepan, combine sugar, corn syrup, water, and a pinch of salt. Heat this mixture over medium heat, stirring occasionally until the sugar dissolves. Once it comes to a boil, keep cooking until it reaches 250°F.
Next, add the peanuts to the mixture. Stir constantly until the temperature reaches 300°F. At this point, the candy will have a deep golden color. Remove the pan from heat and quickly stir in butter and baking soda. This will cause the mixture to foam.
Pour the hot mixture onto the prepared baking sheet and spread it thinly using a spatula. Let it cool completely before breaking it into pieces. Store your peanut brittle in an airtight container to keep it fresh.
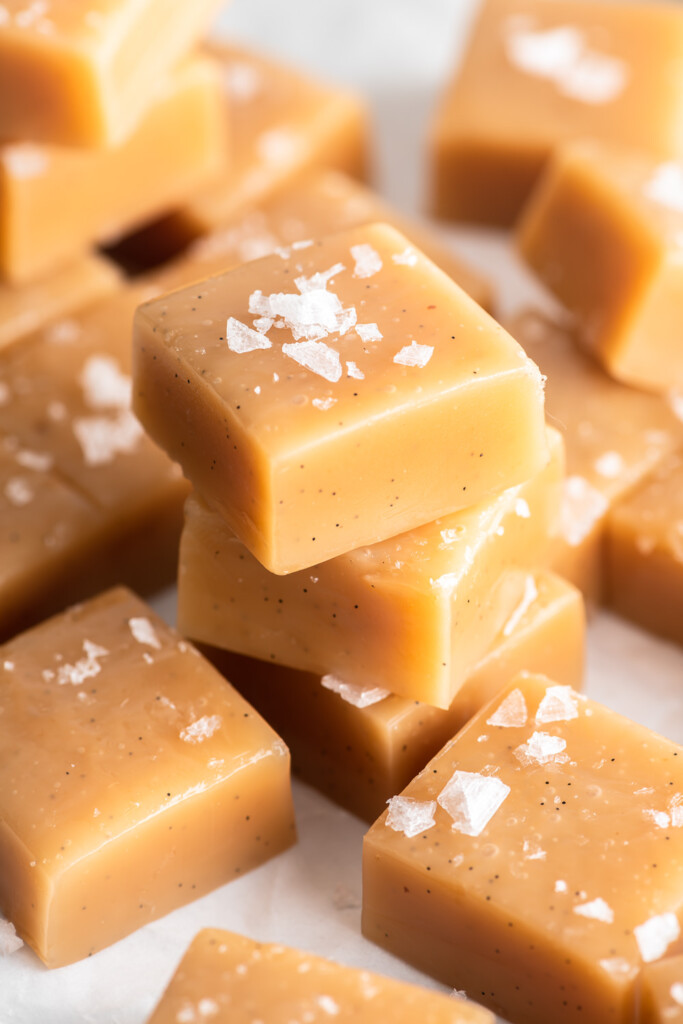
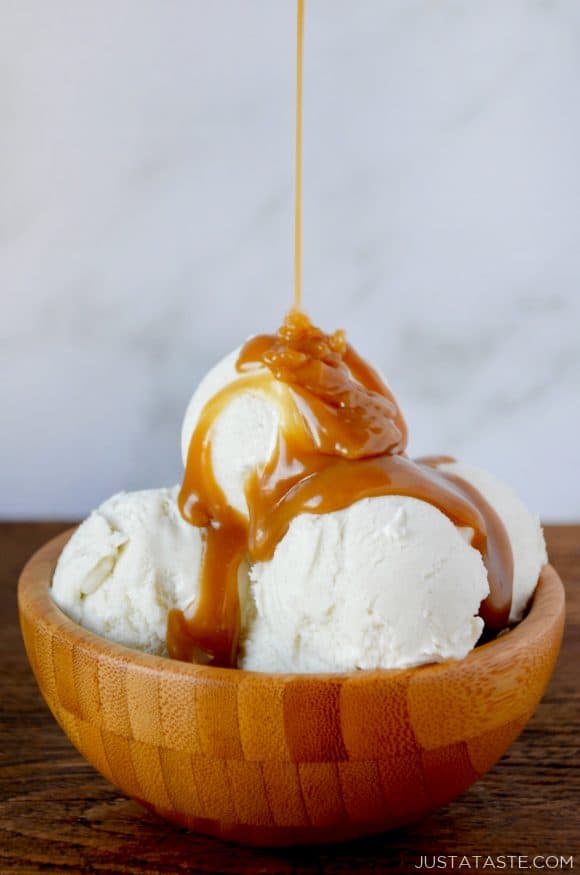
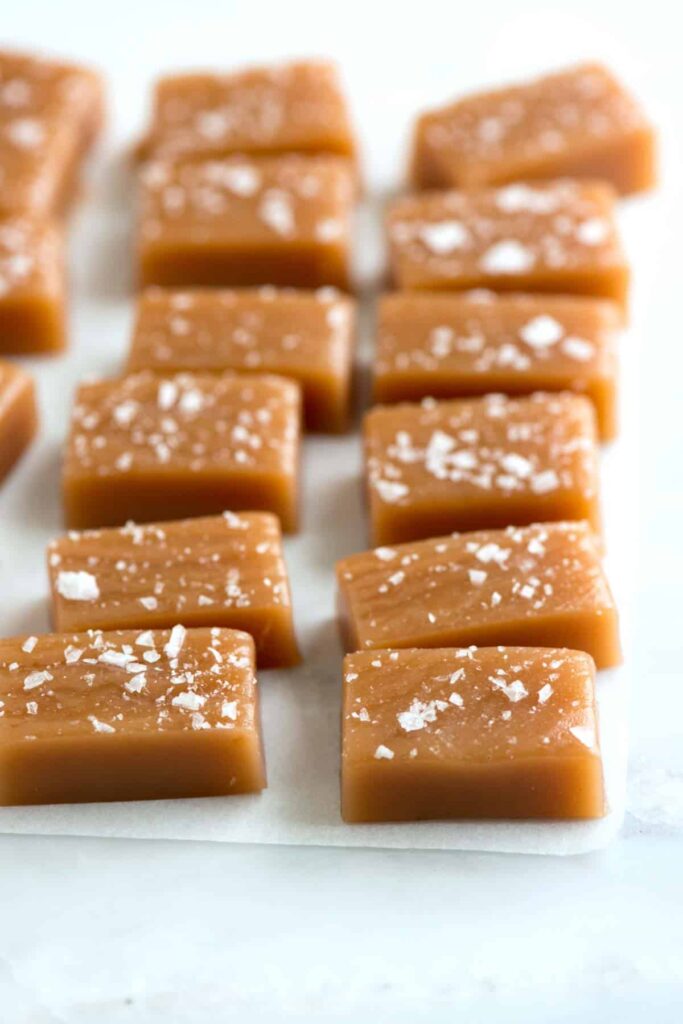
16) Sea Salt Caramels
Sea salt caramels are a perfect blend of sweet and salty. They melt in your mouth and offer a delightful chewiness. To start, you’ll need sugar, corn syrup, heavy cream, butter, and vanilla extract.
First, combine white sugar, brown sugar, corn syrup, heavy cream, and butter in a heavy-bottomed pot. Heat over medium and stir constantly until fully mixed.
Attach a candy thermometer to the side of the pot. Cook without stirring until the mixture reaches 245°F (118°C). Once it hits the right temperature, remove from heat.
Stir in vanilla extract and a teaspoon of salt. Be careful as it may bubble up. Pour the caramel into a prepared pan lined with foil or parchment paper.
Allow the caramel to set at room temperature overnight. After setting, sprinkle with flaky sea salt. Once completely firm, lift the caramel slab out using the parchment or foil and cut into pieces.
Enjoy your homemade sea salt caramels! They make great gifts or special treats for any occasion.
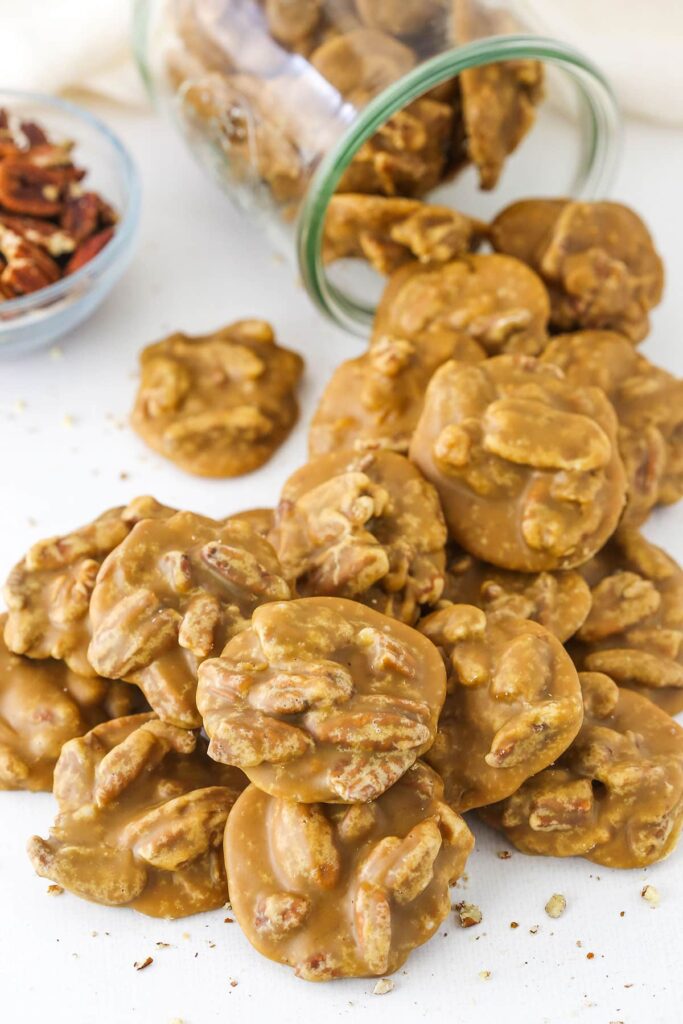
17) Pecan Pralines
Pecan pralines are a classic Southern treat. They are creamy, crunchy, and packed with rich flavors. You don’t need a candy thermometer to make them, so they’re beginner-friendly.
To start, gather ingredients like butter, heavy cream, brown sugar, and pecans. You’ll also need a saucepan and parchment paper.
Melt butter in the saucepan over medium heat. Add the brown sugar and heavy cream. Stir the mixture until it starts to boil.
Once it boils, add the pecans. Continue stirring until the mixture thickens. This usually takes about 3 to 4 minutes.
Spoon the mixture onto parchment paper. Let the pralines cool and harden. You can enjoy them right away, or store them in an airtight container.
Pecan pralines are perfect for gifting or just treating yourself. Their sweet, nutty flavor is irresistible.
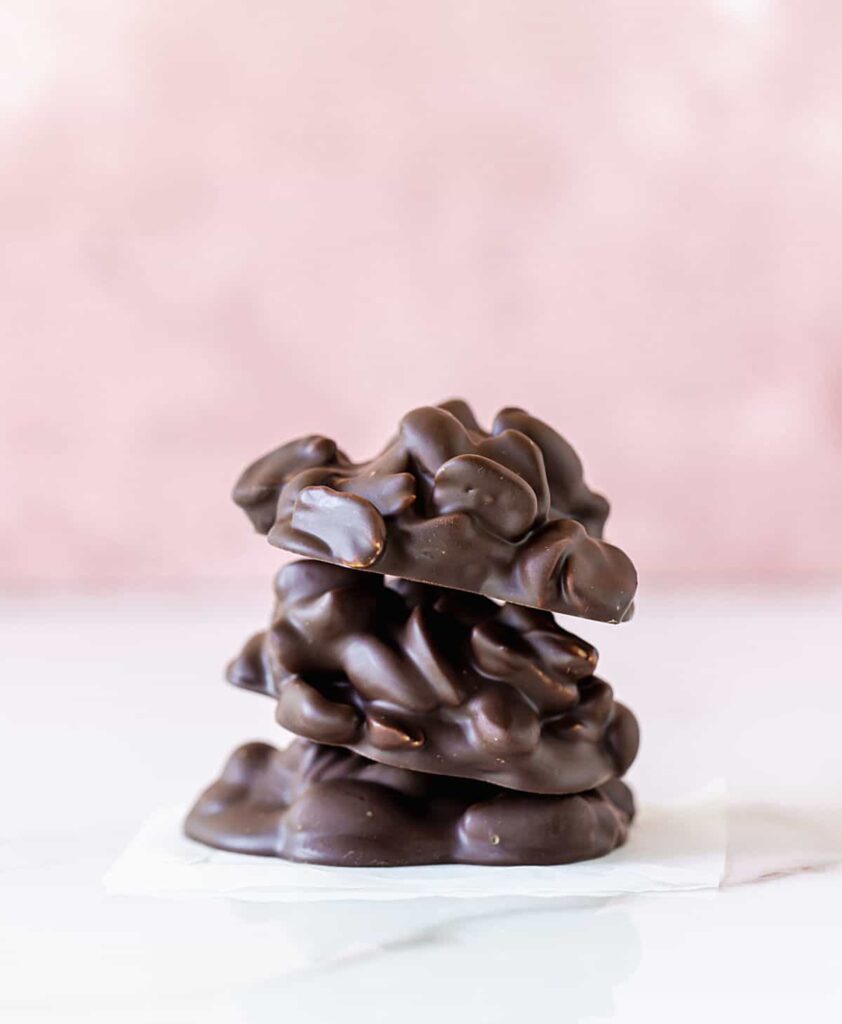
18) Chocolate Peanut Clusters
Chocolate Peanut Clusters are an easy and delicious homemade treat. They combine the rich taste of chocolate with the crunch of peanuts. You can make them quickly with just a few ingredients.
Start by melting chocolate in a microwave-safe bowl. Heat it in 20-second intervals, stirring between each interval until the chocolate is smooth.
Once the chocolate is ready, add the peanuts and stir until they are fully coated. Be sure the peanuts are well mixed with the chocolate.
Next, use a spoon or a small scoop to drop spoonfuls of the chocolate-peanut mixture onto a parchment-lined baking sheet. Make sure to leave space between each cluster.
Let the clusters cool and set. You can let them set at room temperature, which might take a bit longer, or speed up the process by placing them in the refrigerator for about 15 minutes.
These clusters can be stored in an airtight container in the refrigerator for up to one week. They are perfect for snacking or as a sweet gift for friends and family. Enjoy the simple joy of making and sharing Chocolate Peanut Clusters!
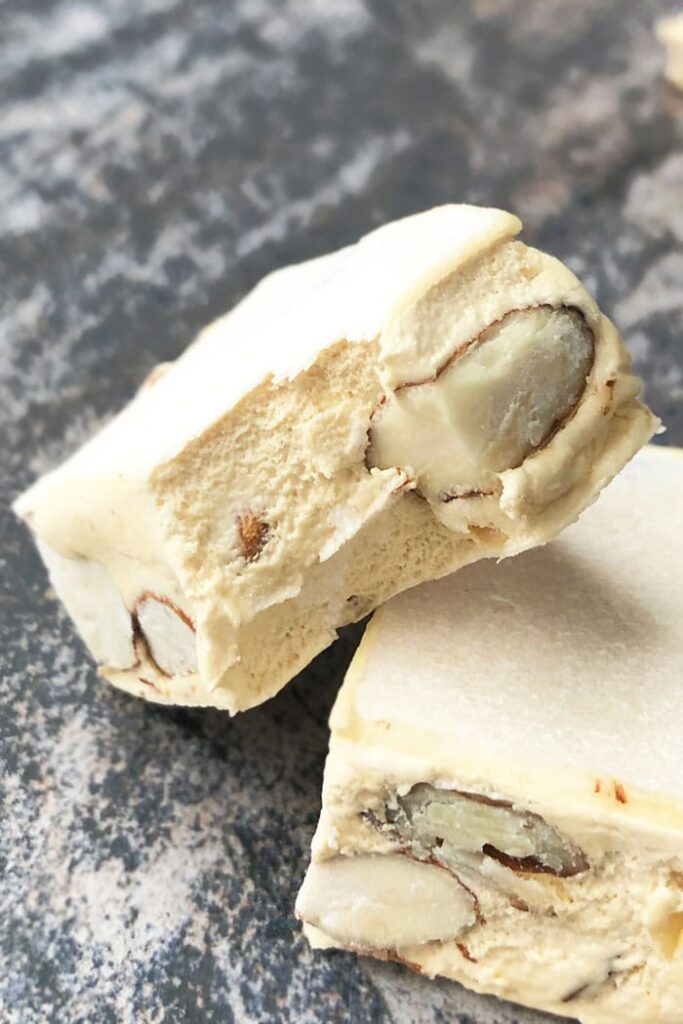
19) Nougat
Nougat is a classic candy with a chewy, nutty texture. This treat often combines honey, sugar, and egg whites, creating a firm but tender bite.
Start with honey-filled Torrone. It’s Italian nougat, loaded with nuts like almonds or pistachios. Cooking syrup to the right temperature is key, so use a candy thermometer for best results.
You can also try making vanilla nougat. Whip egg whites to stiff peaks and fold in sugar. Heating honey to 250°F ensures the perfect consistency.
For chocolate lovers, add melted chocolate or Nutella to the mix. Stir in warm almonds or mini marshmallows for added flavor and texture.
Nougat may seem tricky, but with the right tools and steps, it’s a rewarding candy to make. Experiment with different flavors and nuts to find your favorite combination.
20) Butterscotch
Butterscotch is a classic candy you can make at home with just a few ingredients. It’s a family favorite and perfect for sharing. You’ll need butter, sugar, water, and corn syrup.
Start by melting the butter in a heavy-bottomed pot. Once it’s melted, add in the sugar, water, and corn syrup. Stir until everything is well mixed.
Cook the mixture at medium heat without stirring. Use a candy thermometer to check the temperature. When it reaches around 270°F, add a bit of vanilla and a pinch of salt. Stir gently.
Pour the hot mixture into a greased pan. Let it cool slightly before cutting it into squares. Wait for the candy to cool completely before enjoying.
Butterscotch candies are smooth and sweet with a rich buttery flavor. Making them at home allows you to fine-tune the taste. You can even add a hint of rum or honey for extra depth.
These candies make great gifts or a sweet treat for yourself. With a little practice, you can master this delightful recipe. It’s a fun way to bring a bit of tradition into your kitchen.
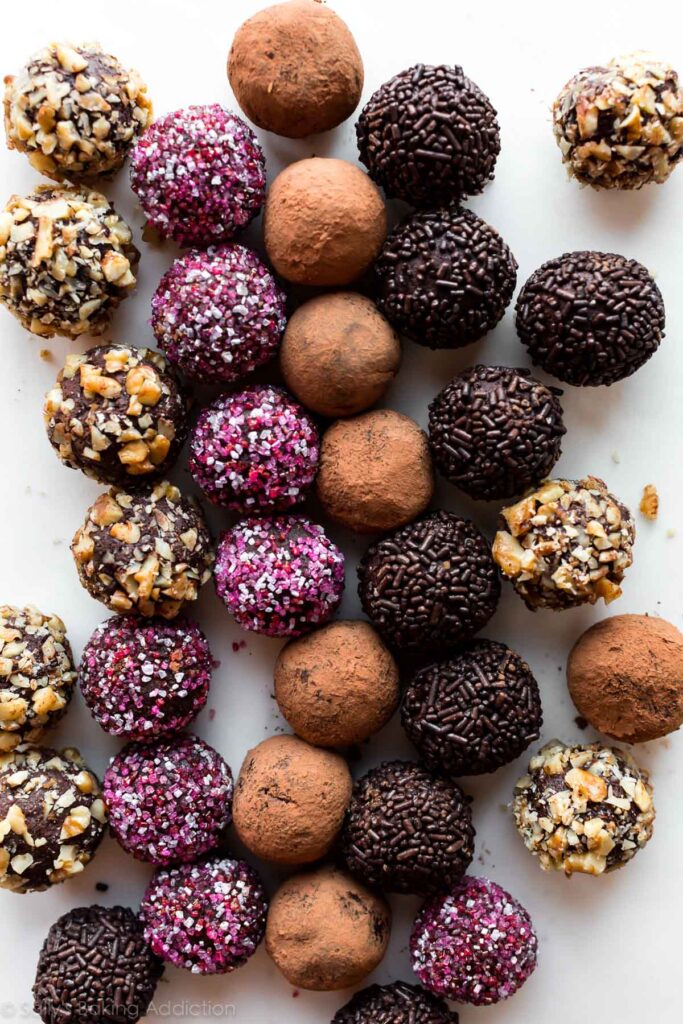
21) Chocolate Truffles
Chocolate truffles are a delightful treat that you can easily make at home. They are rich, creamy, and perfect for any chocolate lover.
To start, you will need good quality chocolate and heavy cream. Begin by chopping the chocolate into small pieces and placing them in a heat-proof bowl.
Next, heat the heavy cream until it’s warm but not boiling. Pour the warm cream over the chopped chocolate and let it sit for a few minutes. This will allow the chocolate to soften.
After a few minutes, stir the mixture until the chocolate is fully melted and smooth. This combination is called ganache, which serves as the base for your truffles.
Refrigerate the ganache mixture for about 1-2 hours, or until it’s firm enough to handle. Once set, use a small spoon or a melon baller to scoop out portions and roll them into balls.
For an extra touch, you can roll the truffle balls in cocoa powder, chopped nuts, or powdered sugar. This adds texture and flavor to your homemade treats.
Enjoy your delectable homemade chocolate truffles with family and friends, or gift them as a sweet homemade surprise!

22) Gummy Bears
Making gummy bears at home can be a fun and tasty project. You only need a few ingredients: gelatin, water, and your favorite juice or flavored drink.
Start by pouring the gelatin into the water and let it sit for a few minutes. This allows the gelatin to absorb the liquid.
Next, combine sugar, corn syrup, and some sorbitol in a saucepan. Bring the mixture to a simmer while stirring.
Once the sugar mixture is ready, add the gelatin mixture to it. Stir until everything is fully melted and smooth.
Pour the mixture into gummy bear molds. Let them cool and set, then pop them out of the molds. Enjoy your homemade gummy bears!

23) Divinity
Divinity is a classic, old-fashioned candy known for its soft, fluffy texture. It’s a staple during the holiday season and brings a nostalgic touch to any dessert spread.
To start, you’ll need a few basic ingredients: granulated sugar, corn syrup, water, egg whites, and a pinch of salt.
Combine the sugar, corn syrup, and water in a medium saucepan. Stir this mixture over medium heat until the sugar fully dissolves. Place a candy thermometer in the saucepan and let the mixture boil, without stirring, until it reaches 260°F (hard-ball stage).
In a separate bowl, beat the egg whites until they form stiff peaks. Then, slowly pour the hot syrup mixture into the egg whites while continuing to beat. This step is crucial for achieving the light, airy texture.
Continue to beat the mixture until it holds its shape and becomes less glossy. This can take a few minutes, so be patient.
Finally, spoon out the candy onto wax paper using a teaspoon. Allow it to set until firm. You can store divinity in an airtight container for several days, making it perfect for gifting or enjoying as a homemade treat.
This delightful candy is sure to impress with its sweet, melt-in-your-mouth texture.

24) Chocolate-Covered Pretzels
Chocolate-covered pretzels are a perfect mix of sweet and salty. These treats are simple to make at home and great for parties. You can use different types of chocolate like milk, dark, or white.
Start by lining a baking sheet with parchment paper. This will keep the pretzels from sticking. Next, melt your chocolate. You can do this in a microwave-safe bowl. Heat the chocolate for 30 seconds, then stir. Repeat until the chocolate is smooth.
Use a fork to dip each mini pretzel in the melted chocolate. Make sure they are fully coated. Place the chocolate-covered pretzels on the prepared baking sheet. Let them cool until the chocolate hardens.
You can also add toppings like sprinkles, crushed nuts, or coconut flakes before the chocolate sets. This adds extra flavor and crunch. Chocolate-covered pretzels are ready to enjoy once the chocolate is firm. Store them in an airtight container to keep them fresh.
25) Cream Caramels
Cream caramels are a delicious treat that can be made at home with simple ingredients. You will need butter, sugar, cream, and light corn syrup.
Start by melting the butter in a heavy saucepan over medium heat. Once melted, add the sugar, cream, and corn syrup. Stir constantly with a heat-resistant spatula.
Bring the mixture to a gentle boil, making sure the sugar dissolves completely. It’s important to keep stirring to prevent burning. Gradually add the cream, continuing to stir until everything is well combined.
Use a candy thermometer to monitor the temperature. You want the mixture to reach around 247-248°F. This ensures that the caramels will set properly and have the right texture.
When the temperature is right, pour the caramel into a prepared dish lined with parchment paper. Allow it to cool completely before cutting into pieces.
Once cooled, cut the caramels into small squares. You can wrap each piece in wax paper to keep them fresh.
Enjoy your homemade cream caramels as a sweet treat or share them with friends and family. They make a perfect gift, especially during the holidays.
26) Espresso Bark
Espresso bark is a delightful treat that combines rich chocolate and the bold flavor of coffee. It’s perfect for those who love both sweets and a caffeine kick.
To make espresso bark, start by melting chocolate. You can use a double boiler or a microwave. If you use a microwave, heat it in short intervals, stirring often.
Once melted, mix in some whole coffee beans. Spread the chocolate mixture onto a baking sheet lined with parchment paper. Make sure to spread it evenly.
Sprinkle coarse cane sugar over the top for a sweet crunch. You can also add dried fruits or nuts for extra texture and flavor.
Let the chocolate harden in the freezer for about 15 minutes. When it’s ready, break or cut the bark into pieces.
This treat is easy to make and fun to customize. Try different types of chocolate and mix-ins to find your favorite combination.

27) Old-Fashioned Caramels
Old-fashioned caramels are a delightful treat that reminds you of simpler times. Making these chewy candies is a fun activity that yields delicious results.
To start, line a baking dish with parchment paper and grease it lightly with butter. This prevents the caramel from sticking.
In a large saucepan, combine butter, brown sugar, corn syrup, and sweetened condensed milk. Stir the mixture constantly over medium heat.
Allow the mixture to come to a gentle boil. Continue stirring to make sure the caramel doesn’t burn. This process usually takes several minutes.
After the mixture reaches a boil, reduce the heat and simmer. Keep cooking until it reaches the soft ball stage, around 236 degrees Fahrenheit. Use a candy thermometer to check.
Once it reaches the desired temperature, pour the caramel into the prepared dish. Let it cool completely before cutting it into small squares.
These caramels can be wrapped in wax paper to keep them fresh. Enjoy your homemade old-fashioned caramels with friends and family.
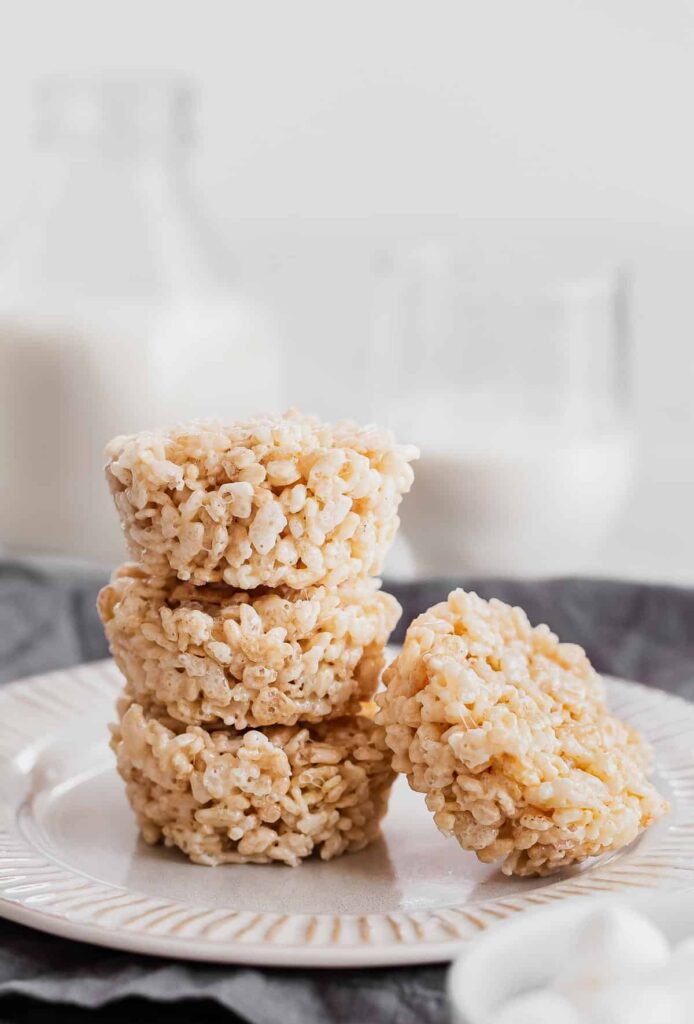
28) Crispy Rice Treats
Crispy Rice Treats are a simple and loved dessert. You’ll need just a few ingredients: butter, marshmallows, and crispy rice cereal.
Start by melting the butter in a large saucepan over low heat. Add the marshmallows and stir until completely melted and smooth.
Remove the pan from heat. Quickly add the crispy rice cereal, stirring until all the cereal is coated with the melted marshmallows.
Pour the mixture into a 9-by-13-inch pan coated with cooking spray. Press it evenly into the pan using a buttered spatula or wax paper.
Let the treats set for at least one hour at room temperature. Once set, remove them from the pan using the edges of the parchment or foil lining. Cut into squares and enjoy!
Store any leftovers in an airtight container at room temperature for up to three days.
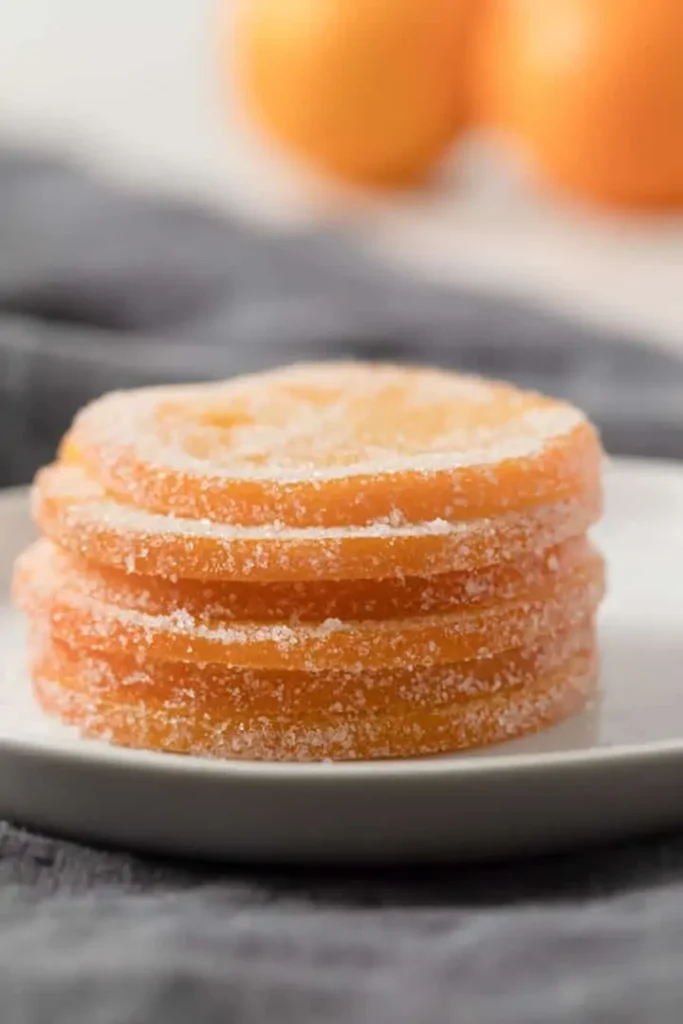
29) Orange Slices
Candied orange slices are a delightful treat that you can easily make at home. Start by washing the oranges thoroughly. Slice them into 1/4-inch rounds using a sharp knife. Discard seeds and any ends.
Next, prepare a simple syrup by combining equal parts sugar and water in a large saucepan. Bring this mixture to a boil over medium-high heat, ensuring the sugar dissolves completely.
Add the orange slices to the boiling syrup. Let them simmer on low heat for 40-60 minutes, stirring gently. The slices are ready when the white pith turns translucent. This indicates the orange slices have absorbed enough syrup.
After simmering, remove the slices with a slotted spoon. Place them on a cooling rack to dry. You can keep them plain or coat them with extra sugar for added sweetness.
Store the candied orange slices in an airtight container. They make a perfect garnish for desserts or can be enjoyed as a sweet snack on their own.

30) Chocolate Nut Clusters
Chocolate Nut Clusters are a simple yet delicious treat that you can make at home. You only need a few ingredients and a bit of time. Here’s how to do it.
First, take a microwave-safe bowl and add your chocolate. Heat it in the microwave for 30-second intervals, stirring between each until it’s fully melted.
Next, add your choice of nuts. Mixed nuts, roasted macadamia nuts, or peanuts all work well. Stir until the nuts are completely coated with the melted chocolate.
Use a spoon or a small cookie scoop to drop spoonfuls of the chocolate-nut mixture onto a baking sheet lined with parchment paper. Leave a bit of space between each cluster.
Let the clusters set at room temperature or pop them in the refrigerator if you’re in a hurry. They should be ready to eat in about 15 minutes. Enjoy your homemade Chocolate Nut Clusters!
Benefits of Making Homemade Candy
Making homemade candy has several benefits, including health advantages, cost efficiency, and the ability to create customized and unique treats. Each of these benefits can improve your candy-making experience.
Health Benefits
When you make your own candy, you control the ingredients. This means you can use healthier options like organic sugars, natural flavorings, and less processed components. Reducing artificial additives and preservatives that are often found in store-bought candy can result in a healthier treat.
You can also adjust the amount of sugar, salt, and fat to meet your dietary needs. For example, if you want to reduce your sugar intake, you can substitute with natural sweeteners like honey or maple syrup. Making your own candy ensures transparency and allows you to make more nutritious choices.
Cost Savings
Making candy at home can be cheaper than buying it from the store. The ingredients you need, such as sugar, chocolate, and nuts, are often less expensive in bulk. You can also avoid the markup costs added to professionally made candies.
Homemade candy makes for cost-effective gifts. Instead of spending a lot on store-bought chocolates for a holiday or special occasion, you can make your own for a fraction of the price. This can be a fun and economic way to show your appreciation to friends and family.
Customization and Creativity
One of the best parts of making your own candy is the opportunity to exercise creativity. You can experiment with flavors, textures, and appearances to match your tastes or to cater to dietary restrictions and preferences of friends and family.
You can make colorful gummy worms, like those made with straws, from natural fruit juices. Or try your hand at chocolate-covered pretzels, which are both easy and fun to make. The possibilities for customization are endless.
Customizing your candy also allows you to create unique gifts or party favors. This personal touch can make holidays and events even more special, turning a simple treat into a memorable experience.
Essential Equipment for Candy Making
To make homemade candy, you need the right tools. These are the pieces of equipment that will help you create delicious treats efficiently.
Thermometers
Using a candy thermometer is crucial for making sweets like fudge, toffee, and caramel. Candy thermometers ensure your mixtures reach the right temperature for proper consistency.
Choose a digital thermometer for quick and accurate readings. For those cooking at different altitudes, remember to adjust your boiling points since water boils at lower temperatures as you go higher. Chocolate thermometers measure the temperature of melting chocolate to prevent it from burning. Keep a backup thermometer, so you’re always prepared.
Molds and Shapes
Candy molds come in many shapes and sizes, making your candies look professional and fun. Use silicone molds for easy release and intricate designs. You can find molds for chocolates, lollipops, and even gummy candies.
Metal molds are another good option, especially for hard candies that need to set firmly. For softer candies, flexible plastic molds work best. Don’t forget to use non-stick sprays or a light coating of oil to lightly grease your molds before pouring in the candy mixture.
Packaging and Storage Solutions
Proper packaging and storage extend the shelf life of your homemade candies. Use airtight containers to keep your candies fresh and to prevent moisture exposure. For gifting, cellophane bags and decorative boxes add a personal touch.
When storing chocolate, use cool, dry places to maintain its texture and prevent it from melting. Wax paper or parchment paper can be used between layers to prevent sticking. For caramels and toffees, individually wrap each piece in wax paper to keep them from forming a sticky mess.
Tips for Perfecting Homemade Candy
Mastering homemade candy takes practice, patience, and some key tips. Focus on controlling temperature, using high-quality ingredients, and getting the timing and consistency just right.
Temperature Control
Temperature is crucial when making candy. Use a candy thermometer to ensure you achieve the correct temperatures for different stages. For example, soft ball stage (235°F-245°F) is ideal for fudge, while hard crack stage (300°F-310°F) is needed for hard candies like lollipops.
Avoid making candy on humid or rainy days as moisture can affect the texture. Keep a steady temperature without sudden changes to prevent crystallization or burning.
Stirring also affects temperature. For certain types of candy, like caramels, constant stirring helps to avoid scorching and keeps the mixture smooth.
Ingredient Quality
High-quality ingredients make a big difference. Use fresh butter and pure extracts for better flavor. When recipes call for chocolate, choose quality chocolate with a high cocoa content.
For nut-based candies, use fresh nuts. Stale nuts can ruin the flavor and texture. Always toast nuts lightly to enhance their flavor before adding them to your candy.
If using food colorings, opt for gel-based or powdered varieties. These are more concentrated and won’t alter the consistency of your candy mixture.
Timing and Consistency
Timing is everything in candy making. Pay attention to recipe instructions for cooking times. If a recipe says to boil for exactly 5 minutes, set a timer.
Watch the consistency of your mixture closely. For fudge, you’ll need a smooth, glossy texture before pouring it into molds. For brittle, look for a shiny, amber hue.
Once your candy reaches the right stage, act quickly. Candy can harden fast, so have everything ready for the final steps. For soft candies, let them set properly before cutting or handling.
By keeping these tips in mind, you can improve your homemade candy-making skills and create delicious treats every time.


